Leave Your Message

How to Choose the Best Climbing Work Gear?

Choosing the best Climbing Work gear begins with risk, not brand popularity. In 2022, the U.S. Bureau of Labor Statistics recorded 865 fatal workplace injuries involving falls, slips, and trips. OSHA also reported 395 construction deaths from falls to lower levels that year. These figures make one point clear: equipment selection needs evidence, careful inspection, and task-specific judgment.

Patrick J. Kapust, former OSHA Deputy Director of Enforcement Programs, stated, “Falls are the leading cause of death in construction.” His warning applies directly to rope access, tower maintenance, rescue support, and other elevated tasks. A suitable system may include a certified helmet, full-body harness, energy-absorbing lanyard, compatible connectors, reliable rope, gloves, and footwear with firm grip. Each item must match the work method, environment, user size, and applicable regional standards. A comfortable harness matters when standing on a narrow platform for hours. A clear visor matters when dust or metal fragments threaten visibility. Small details become serious quickly.

IRATA’s international safety reports also show why trained systems matter. Its members have logged millions of rope-access working hours while maintaining closely monitored incident data. Still, statistics cannot predict every mistake. Gear can be excellent. Judgment can fail. Workers should inspect stitching, gates, ropes, labels, and abrasion before every use. Retirement decisions should follow manufacturer guidance and competent-person assessment, not guesswork. This guide compares practical features, safety evidence, durability, and fit. It will not promise a perfect setup. No checklist can replace training, supervision, or honest reflection after each climb.
How to Choose the Best Climbing Work Gear?

Assess the Climbing Work and Its Hazards

Before choosing climbing work gear, define the job in plain terms. Will the worker inspect a tower, repair a roof, or move between structures? Each task creates different exposure. A roof edge brings fall risk; loose gravel can shift underfoot. Wind may push a worker away from a surface, while rain makes handholds and tools harder to control. Look closely at the actual work area, not just a diagram.

Check the height, access route, anchor locations, and expected work position. Note sharp edges, falling objects, heat, electrical hazards, and nearby equipment. Ask how long the worker must remain suspended and whether tools need to be carried. Small details matter. A heavy drill can change balance. A narrow ledge may limit movement. Talk with the workers who know the site; they often notice hazards a planner misses. Then confirm that selected gear fits the task, is compatible as a system, and has been inspected by a competent person according to its instructions and applicable workplace requirements.

Conditions can change after the assessment. I have seen a simple task become harder when wind rises or a route is blocked. Recheck the plan when the surface, weather, or work method changes. Do not treat a checklist as proof that every risk is covered. Some assumptions will be wrong. Pause, discuss what changed, and adjust the controls before climbing continues.

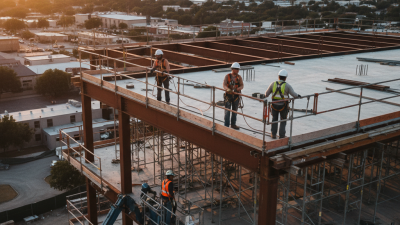
How to Choose the Best Climbing Work Gear? — Assess the Climbing Work and Its Hazards

Assess each worksite hazard before selecting climbing gear. For noisy worksites, OSHA’s permissible exposure limits show how allowable exposure time decreases as sound levels rise. Hearing protection may be necessary; it does not replace fall-protection equipment suited to the climbing task.

Check Applicable Safety Standards and Certifications

How to Choose the Best Climbing Work Gear?

Check Applicable Safety Standards and Certifications

A harness can look sturdy and still be wrong for the job. Check its label, instructions, and certification before climbing. In the United States, look for equipment that meets the applicable ANSI/ASSP Z359 requirements; other regions may use different standards, such as EN 361 for full-body harnesses. Match the standard to the complete fall-protection system, not just one item. A certified harness paired with an incompatible connector is not a safe setup. The U.S. Bureau of Labor Statistics reported 395 fatal falls, slips, and trips in construction in 2022. That number is a sobering reminder: paperwork matters, but so does correct use.

Keep records of inspections and training, and ask a qualified safety professional when a standard or label is unclear. Requirements can vary by task and location, so do not assume one certificate covers every use. I’d be cautious about treating a quick visual check as proof of safety; it can miss internal damage or a poor fit. Test the fit on the ground, adjust leg straps, and make sure the dorsal attachment sits correctly.

Sources: U.S. Bureau of Labor Statistics, Census of Fatal Occupational Injuries, 2022; ANSI/ASSP Z359 series; EN 361.

Choose the Required Personal Protective Equipment

Choosing the required personal protective equipment starts with the task, not the gear shelf. A worker inspecting a tower may need a different setup from someone trimming a tree. Identify fall hazards, sharp edges, moving equipment, and possible rescue needs before selecting equipment. Check site procedures and consult a qualified safety professional when the risks are unclear.

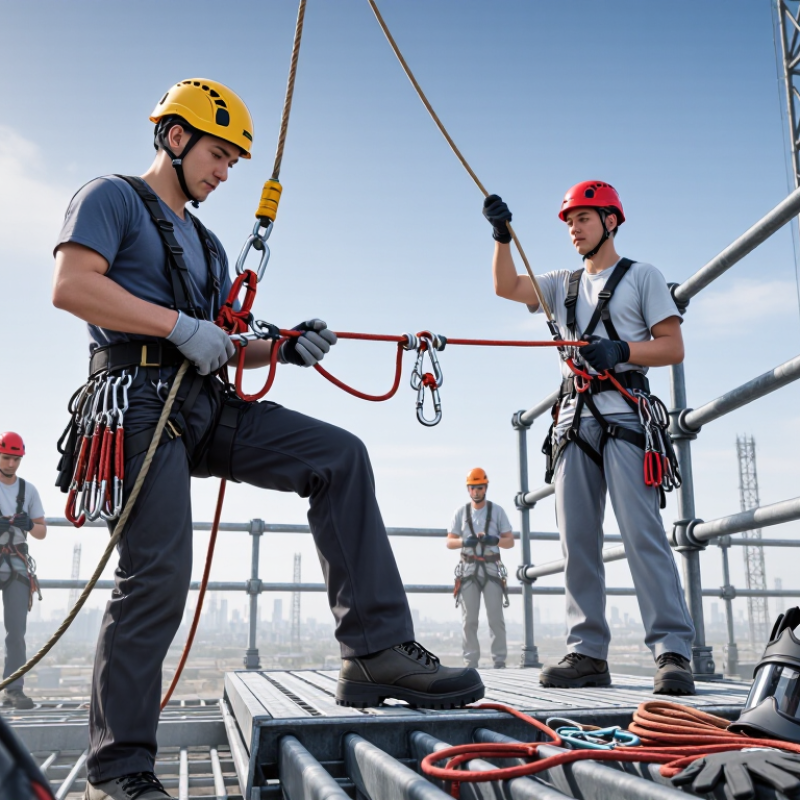
A full-body harness should fit snugly, with straps lying flat and buckles secured. Pair it with a compatible connection system and a suitable anchorage; each part must work with the others. A helmet with a secured chin strap, protective eyewear, gloves, and sturdy footwear may also be needed for the specific job. Fit matters. Loose gloves can catch, while poorly adjusted harness straps can shift during movement.

Inspect equipment before every use. Look for frayed webbing, cracked parts, damaged stitching, and labels you can still read. Remove questionable items from service and follow the maker’s inspection and retirement instructions. Keep records, even when the gear looks fine; appearance alone can be misleading. I have seen people focus on buying the right equipment and spend too little time practicing with it. That is an easy mistake. Workers need hands-on training, clear rescue plans, and time to check that their setup is actually compatible.

Verify Fit and Compatibility Across Gear Components

Choosing climbing work gear is not about matching colors or buying a complete-looking kit. Every connection must work with the next component. A harness, connector, rope, and anchor system can each be rated yet still be unsuitable together. Check the instructions for each item, including approved connection points, rope diameter, connector shape, and load limits. Small details matter. A gate may press against an attachment point, or a connector may sit cross-loaded instead of along its strongest axis. That is easy to miss.

Lay the setup out before leaving the ground. Clip the components together as intended, then check that gates close freely and no webbing twists under tension. Confirm that the rope device accepts the rope being used, and that the anchor arrangement suits the planned work and fall-clearance needs. Compatibility is not always obvious from appearance. Ask a qualified person to review uncertain combinations; do not rely on guesswork or a hurried visual check. I have seen how tempting it is to assume familiar equipment will fit together. That assumption deserves a second look. Inspect for wear, damage, and unreadable labels, and follow the equipment maker’s guidance. If a part feels forced or behaves unexpectedly, stop and reassess the system.

How to Choose the Best Climbing Work Gear? — Verify Fit and Compatibility Across Gear Components

Gear Components What to Verify Practical Fit or Compatibility Check Warning Signs
Full-body harness and worker Harness size range, adjustment points, condition, and correct orientation Follow the harness instructions. Adjust the leg, waist, and chest straps so the harness is secure without restricting movement. Confirm the dorsal attachment point sits in the position specified by the manufacturer. Loose straps, twisted webbing, damaged stitching, unsecured buckles, or a fit that shifts substantially during movement
Harness attachment point and connector Whether the connector is approved for the intended attachment point and use Check the equipment instructions for the permitted connection method. Ensure the connector is fully closed and locked, and that loading will occur along its intended major axis. Cross-loading, side-loading, contact with an edge that can press the gate, or a connector that cannot close and lock freely
Connector and anchor point Anchor suitability, connector orientation, clearance, and secure closure Use an anchor approved for the task and applicable work-at-height requirements. Check that the connector seats correctly and is not bearing on a sharp edge or unstable surface. Unverified anchor strength, gate resting against a surface, connector trapped in a position that can load the gate, or an unsuitable attachment method
Rope and rope-grab device Rope diameter, construction, condition, and device-approved rope range Match the rope to the device instructions; compatible devices are not necessarily suitable for every rope. Confirm correct installation and function-test the device as directed before use. Rope outside the specified diameter range, incompatible rope construction, incorrect orientation, glazing, cuts, contamination, or poor device movement
Energy absorber and connection system Approved system combination, fall clearance, and total working length Use only combinations permitted by the equipment instructions. Calculate required clearance using the system information, including absorber deployment, worker length, and applicable safety margin. Insufficient clearance, an absorber connected contrary to its instructions, or an improvised combination of components
Work-positioning lanyard and harness Approved attachment points, adjustment range, and intended use Confirm the lanyard and harness instructions permit the chosen arrangement. Keep the system adjusted for stable positioning and use a separate fall-arrest system when required by the task plan. Using positioning equipment as fall protection without approval, excessive slack, or attachment to an unsuitable point
Helmet and chin strap Fit, retention, condition, and suitability for the work environment Adjust the helmet so it remains stable during movement. Secure the chin strap as instructed and check that it does not interfere with other required PPE. Helmet movement, a damaged shell or suspension, an unsecured strap, or poor fit when worn with required eyewear or hearing protection
Complete system and worksite Compatibility of every component, rescue arrangements, and inspection status Review the equipment labels and instructions as a complete system, inspect before use, and confirm the work plan addresses fall clearance, swing-fall exposure, edge hazards, and rescue. Unclear component compatibility, missing inspection records where required, unaddressed fall hazards, or no practical rescue plan

Important: This checklist is general guidance, not a substitute for equipment instructions, competent-person assessment, training, or applicable local regulations. Standards and requirements vary by jurisdiction and task. Do not combine components unless their instructions and the applicable system requirements permit the combination.

Inspect, Maintain, and Replace Equipment as Needed

How to Choose the Best Climbing Work Gear?

Inspect, Maintain, and Replace Equipment as Needed

Reliable climbing gear needs regular attention, not just a careful purchase. Before each shift, inspect the harness, lanyard, connectors, and anchor points under good light. Look for frayed stitching, cuts, corrosion, deformation, and labels you can no longer read. Open and close each connector; it should lock without sticking. Check the manufacturer’s instructions for inspection criteria and service life.

OSHA’s 2022 construction fatality data recorded 395 deaths from falls, slips, and trips. That figure is a sober reminder: small defects deserve attention.

Keep a simple, dated inspection record. Note the equipment identifier, inspection date, findings, and the person who checked it. After exposure to chemicals, sharp edges, heat, or a fall-arrest event, remove affected gear from service until a qualified person assesses it. Do not repair damaged load-bearing components with tape or improvised stitching. Store equipment dry, away from sunlight, solvents, and sharp tools. A dusty gear room can hide wear.

Replace equipment when it fails inspection, has been shock-loaded, or reaches the end of its specified service life. Follow the maker’s guidance; there is no universal expiry date for every item. I’ve found that rushed checks are easy to miss, especially at shift change. Slow down. If the history or condition is uncertain, quarantine the item and document why.